Published: October 30th, 2025
 4 Min Read
If the kitchen furniture does not look as attractive as you would like, you can update its exterior finish. Specialists from Artos, a company that offers repair services in the city of Charlotte, explain how to effectively and affordably refresh the finish of kitchen cabinets.
Updating the finish of kitchen cabinets
The process of changing the appearance of furniture requires a responsible approach. It includes several stages described below.
Prepare in advance
The first step is to prepare the room. It is advisable to remove all unnecessary items — kitchen table, chairs. Cover surfaces with plastic film to protect them from dirt. Ensure access to fresh air: windows should be fully open, and it is preferable to have a fan.
The second step of preparation is purchasing everything necessary. You will need:
- Paint of a suitable color
- Orbital sander, sanding block, sandpaper (various grits)
- Degreaser
- Wood filler to fix gaps, unevenness, and scratches
- Paint scraper or special paint-removal machine
- Putty knife
- Respirator to protect airways from dust and paint fumes
- Gloves
- Protective film (polyurethane or polyethylene)
- Microfiber cloth or soft lint-free fabric
- Roller and brush
- Wood sealant
- Solvent
- Cleaning agent
- Screwdriver, drill or driver
- Varnish
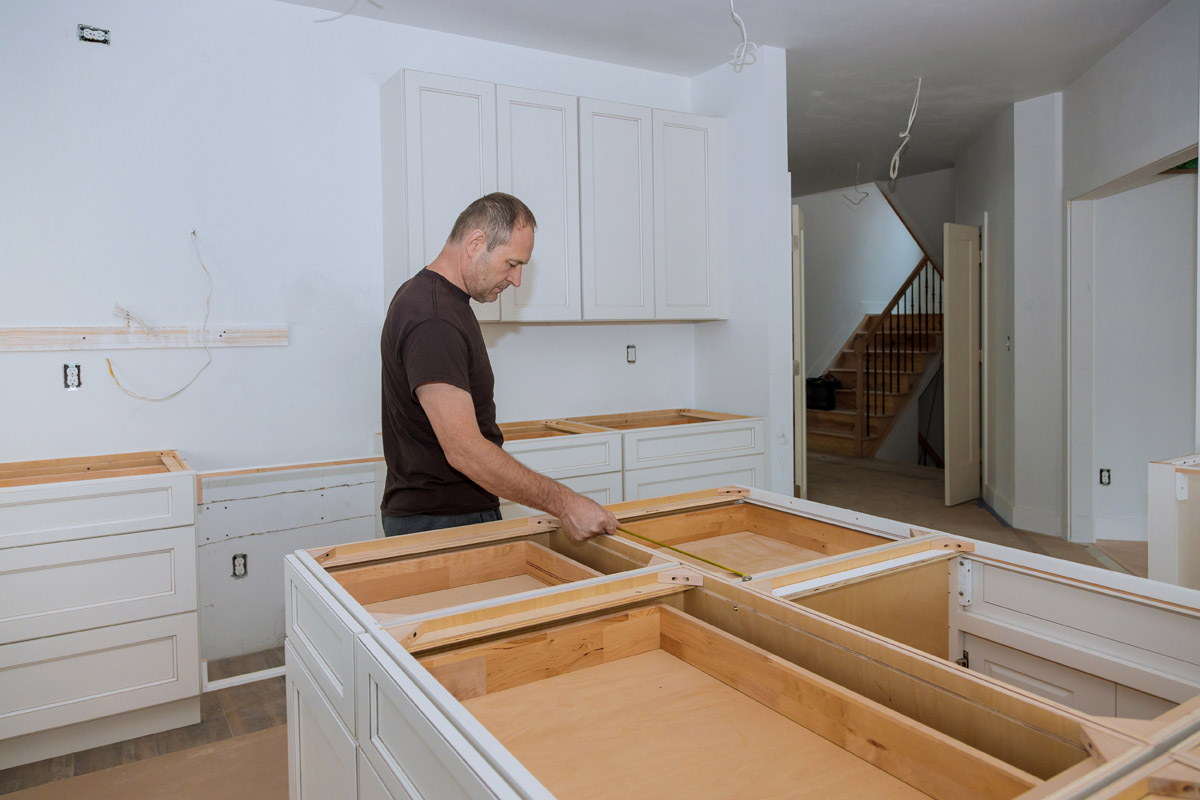
Remove doors and drawer fronts
Dismantle the doors. To detach them, unscrew the fasteners using a screwdriver or power driver. To remove drawer fronts, unscrew the screws (if that’s how they’re attached) or gently separate the front parts with a screwdriver if they are fixed with nails. Also, remove the hardware. Number or label all parts to avoid confusion during reassembly. It’s also recommended to mark the drawer fronts and doors.
Remove the old finish
To remove old paint, use the appropriate solvent or a paint-removal machine. Some areas are easier to treat with a scraper. If stains are found under the paint, remove them with a suitable cleaning product.
Important! Always work with protective gloves.
Repair damaged areas
Eliminate chips, scratches, gaps, and other defects. Use a filler compatible with wood. After local repairs, sand the surface to make it smooth. For the first pass, use a sander, then finish by hand with sandpaper. After sanding, remove all wood dust from the surfaces — you can blow it out with a fan or hair dryer (on a cool setting).
Apply sealant
Before painting, treat the fronts with a wood sealant. This will both smooth out the surface by filling remaining pores and provide protection from moisture, which is harmful to wood. After the sealant dries, wipe the surface with a soft cloth or microfiber towel.
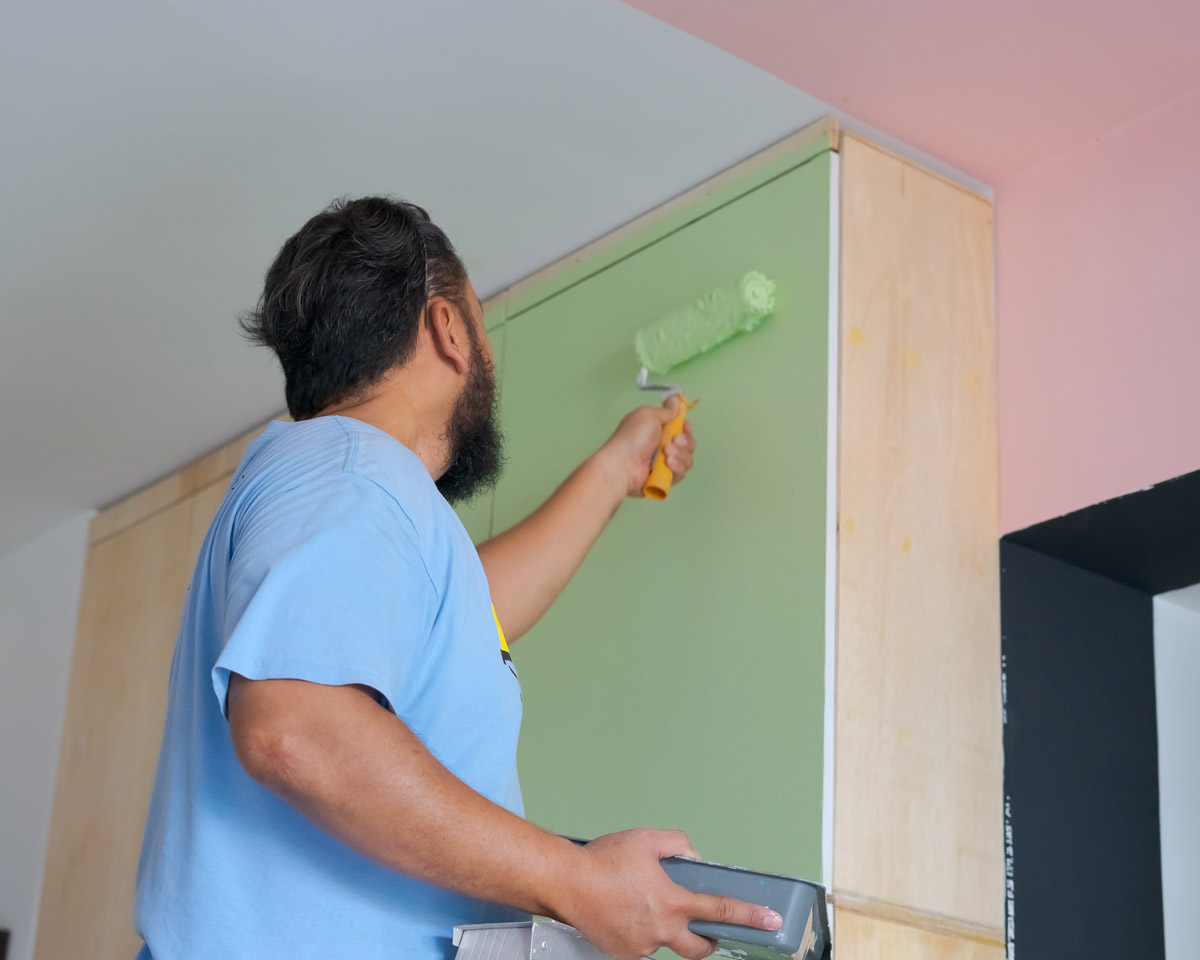
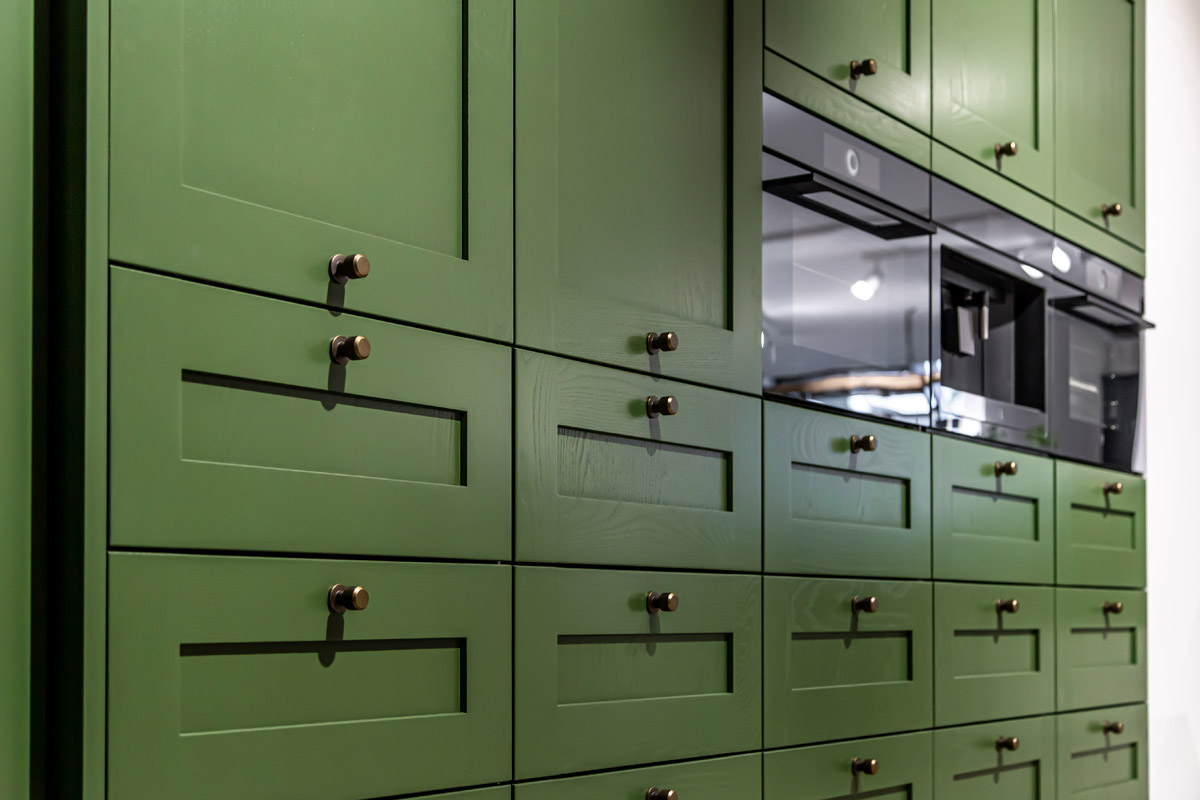
Painting the cabinets
Finally, the main stage — painting. Apply paint with a roller or brush, depending on the size and type of cabinets. Large pieces are more convenient to paint with a roller, while small ones with many protruding elements are best done with a brush. You can also combine both methods.
Tip! To choose the best method, test different options on an inconspicuous area of the cabinet, for example, the back side of a door.
Apply the final protective coat
When the painted surface is completely dry (the exact drying time is indicated on the product packaging), apply varnish — clear, suitable for wood, and polyurethane-based. Before applying, wipe the cabinets with a cloth to remove dust. Read the instructions on the varnish packaging and follow them carefully to achieve the desired result.

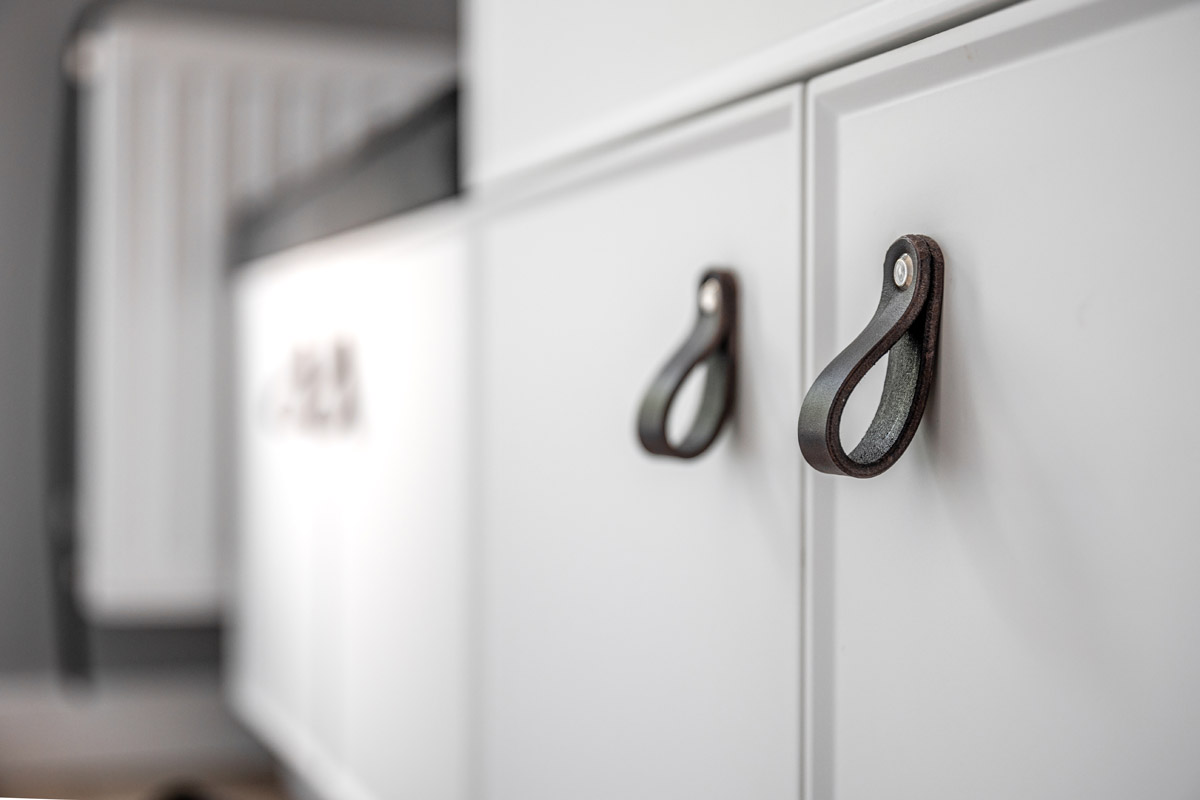
Update the cabinet hardware
Handles and hinges undergo heavy use during frequent opening and closing. They wear out, lose shine, and become unusable. If the old handles look unattractive, replace them — this will improve both comfort and the overall look of the fronts.
To choose new hardware, remove one of the old pieces and take it to the store. This ensures the accessories you buy will be the right size. Also, decide on the hardware style. Possible options include:
- Classic. Characterized by simple soft shapes, traditional metals (bronze, brass, copper), and restrained elegance.
- Art Deco. Luxurious and original style, featuring expensive materials like carved stone, bronze with cast patterns, and rare woods (usually dark) with carving. Forms are varied — abstract, intricate, and asymmetrical.
- Modern. Minimalist design, steel and chrome, simple lines, clean contours.
- Eclectic. Informal style mixing multiple design approaches, allowing for a unique look.
Tip! To decorate cabinets that seem plain, you can use decorative elements such as moldings — raised overlay strips. They can match the main color or contrast with it, creating an interesting accent. Use special glue for attaching moldings. Wear gloves during work and keep windows open.
Summary
If you want to renew and transform your kitchen cabinets, contact professionals — Artos. Our specialists will assess the environment, listen to and consider clients’ needs and wishes, choose the best solution, and discuss it with the customer.
We will handle everything: project design, material selection, preparation, main finishing work, and final coating. Our team strictly adheres to deadlines and fulfills all commitments.